Fix Extend Volume Greyed out in Windows server 2016 - 3 ways
Summary
Sometimes you will find that the extend volume option greyed out on Windows server 2016 disk management when you try to extend partitions of your hard drive. This article will show you why this problem happen and how to extend the partitions on the hard drive.
Table of Contents
Why extend volume greyed out on your Windows server 2016
There are a list of possible causes for extend volume is disabled in Windows server 2016 disk mangement.
- The target volume is not NTFS filesystem
- There is no adjacent free space next to the one you want to expand
- The disk is MBR that can only hold 2TB disk space...
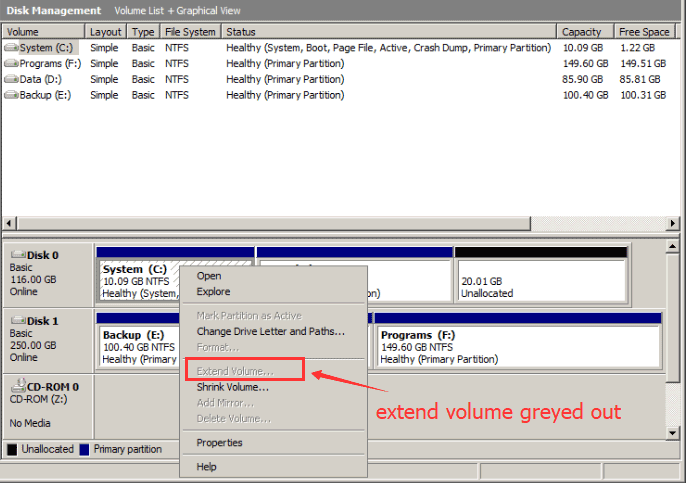
This problem arises the same for different operating systems of windows including a variety of servers like 2003, 2008, 2010, 2012, 2016 and 2019.
Extend Partition when Server 2016 Extend Volume Disabled - 3 Ways
Solution #1 - Extend partition by deleting volume in disk management
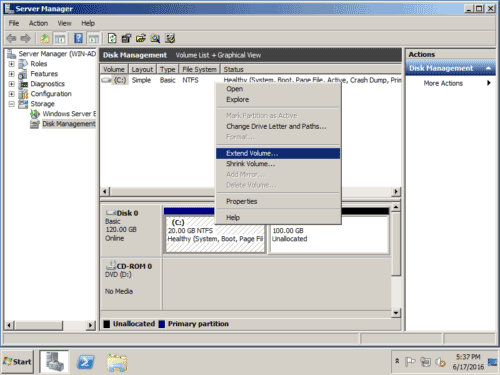
You may delete a volume to make free space available on the same disk to expand the one you want to make it with more space. If you are using raid volumes, you may add space from another disk to the one you want to expand.
Note: deleting volume may erase all files on the drive, please backup data onto somewhere else before the deletion.

Free space is available on the disk.

And then 'Extend volume' will be enabled on the right click option.
Video - how to delete partition and extend volume (The video shows steps in Windows 10, it is the same functions in Windows Server 2016 etc.)
Solution #2 - Extend partition by shrinking volume in disk management
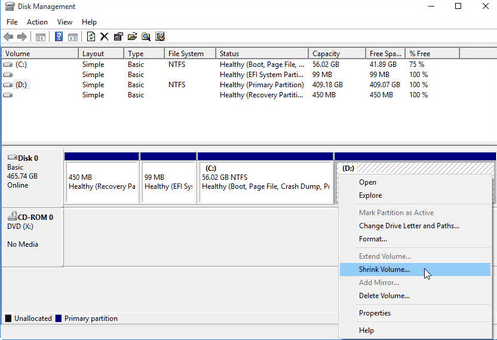
Shrinking volume by the nearby volume could produce free space for your disk to redistribute the space.
Here is a video that shows the shrinking in Windows 10 disk management and then extend volume with the free space. It is kind of same in Windows Server 2016.
There are some scenarioes that disk management won't be able to extend volume when the free space is far away from the drive you want to expand, however it could be done by IM-Magic Partition Resizer Server which can safely resize disk partitions, move partitions/unallocated spaces without losing data, convert disk to GPT from mbr, format volume from fat32 to NTFS, convert partition bewteen primary and logical etc...
Solution #3 - Extend volume with Partition Resizer Server
Windows Disk Management seems to do no good in this regard because there is no unallocated or free space next to the drive you want to expand, you could delete the next drive completely and then extend the C: drive, but it will cost you a lot of hard work and time. In order to save you both there comes this unique and cool program named IM-Magic Partition Resizer SERVER edition. It is a very popular and reliable tool. It carries a variety of functions like resize/remove a partition, split, merge partitions, allocate or create free space and many more. You can use this fantastic program to extend drive when extend volume greyed out server 2016 , and it will never disappoint you.
 and launch the software and open disk map, there you can see all the disk elements installed on your system.
Step-1, Create the unallocated space by using shrink any large volume/partition.
 Extend partition with Partition Resizer Server
Step-2, Shrinking volume by dragging the arrow to the right if you want to expand the left drive.
Eg, when you want to expand c, you may shrink the one next to c to the right, and there will be unallocated space on the right side of c drive.
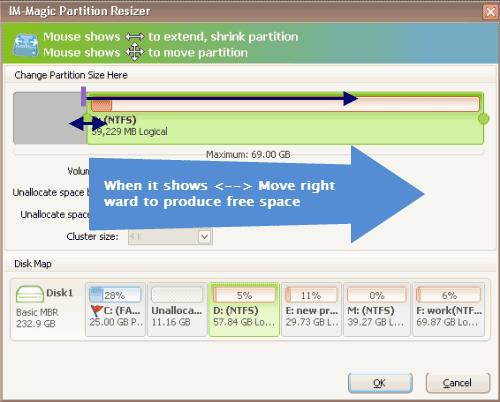 Extend partition with Partition Resizer Server
And then free space will be made available next to c drive.
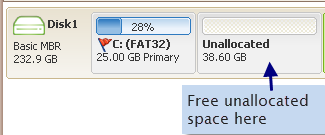 Extend partition with Partition Resizer Server
Step-3 Then right click c and drag the border to acquire the free space.
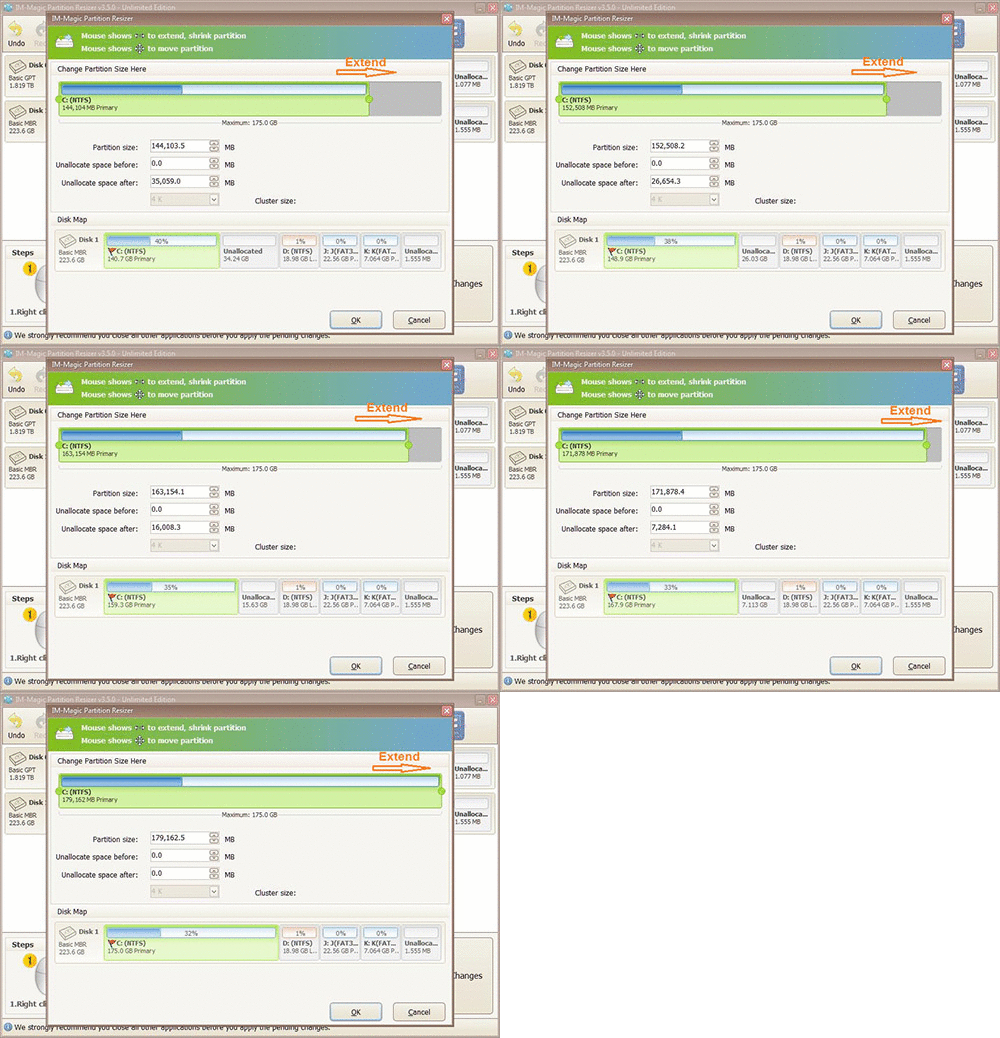
Steps to resize your disk partition
Step-4 Apply the changes.
For further details and video guide about disk operations, visit our website:
https://www.resize-c.com/video/
More Information
Those of you who use Microsoft Windows may be familiar with an error message about low disk space on Drive C: here is what happens; You don't get any more updates from Windows, no Anti-virus or Anti-malware updates either. And you don't get to store any new data because there isn't any free space in the first place.
Lucky for Windows users, Windows has provided with a built-in tool called Disk Management, which controls all the basic as well as advanced actions regarding disks or local drives. It can execute a series of commands like to shrink a volume, create, extend, merge, delete or even format the volumes.
So, in particular, we deal with an issue regarding Local Disk C: on the disk management tool. When our space in C drive is filled up, we tend to extend the volume, but can't seem to do so. Because when we right click on drive in disk management in order to extend its volume, the extend volume option is greyed out. Mean's you can't access or execute the respective action. In simple words you can't extend greyed volume.
More Related Articles You May Like
Related Product
- IM-Magic Partition Resizer Server - Partition space redistributing software that works for Windows Server 2003-2022.
