Resize Partition on SBS 2011 with 3 Solutions
Summary
If you need to extend your C drive on sbs 2011 or manage your disk partitions well, you can find solutions in this article to make it. We will introduce you 3 solutions to extend your C drive and resize your sbs 2011 disk partitions.
Table of Contents
Introduction
You would have noticed that your Windows server system computer tends to get slower as it gets older. You might receive a pop-up even, that you are running out of space. Sometimes, there might be enough space in the C-drive even and you wonder how it could be running low on space when there is, in fact, more than enough space. This is why you need to resize the partitions on your Window server 2011. Your PC is divided into different partitions from the factory. Truth is, your server takes up lots of space to store important files that are necessary for the proper functioning of your Windows Server 2011. So, it is necessary to do a routine change to the sizes assigned to the different partitions. This can be done in three ways;
1. Resize Partition SBS 2011 Using Disk Management Tool
Use of the window’s built-in tool, Disk Management, is always the first line of action. Using this feature requires that an unallocated space is available next to the C-Drive, if there is none, then this tool is of no use, you should try other ways. But if there is, you can click the EXTEND VOLUME option active and follow these steps below;
Locate the ‘start’ button and right click, different options will be displayed, click on DISK MANAGEMENT.
Go on to the Disk Map section and click (right click) on the C-Drive option and then click on EXTEND VOLUME.
2. Resize Partition on Windows Server 2011 Using Diskpart Command
Like every other window, the new windows server 2011 is equipped with Disk Management feature which allows users extend or shrink volume. But these functions are not 100% efficient as it does not allow you extend a particular partition by shrinking others. If you have a problem with the Disk Management tool, then, Diskpart is a sure alternative. But it also requires an unallocated space next to C-Drive. If you have the required space, then this is how to go about it;
You may need to run ‘diskpart’ before it boots into windows. Only do this if you have the required space yet it is showing ‘error.’
First, click on Diskpart then input ‘list volume’ and press the ‘enter’ key.
After which, you input ‘volume C’ and press the ‘enter’ key.
Lastly, input ‘extend size’and press the ‘enter’ key then input any size of your choice.
Note that the size you select depends on the size of the unallocated space.
3. Expand C Drive SBS 2011 Using IM-Magic Partition Resizer Server
When the aforementioned ways fail to yield any success then, you should try resizing the partitions using a partition software, and trust me, IM-Magic Partition Resizer server is your best bet for the job. This program performs several functions with 100% efficiency and it is easy to use, too. All you have got to do is; run the ‘IM-Magic Partition Resizer server on your PC and choose the partition you wish to resize, whether there is an unallocated space next to it or not, then click on ‘resize or move partition’ then you can drag the mouse to extend or shrink the partition.
 Resize partition on Windows server 2011 using IM-Magic Partition Resizer Server
[Guide] Steps to extend volume without data loss
 This step by step guide will show you the right way to extend any volume using IM-Magic Partition Resizer Unlimited edition.
Step-1 Download install, and launch the program.
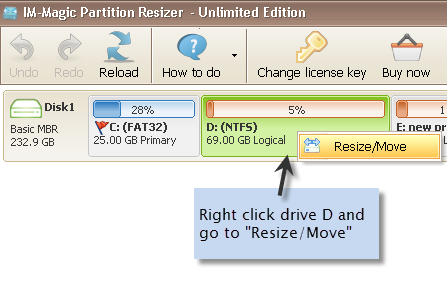
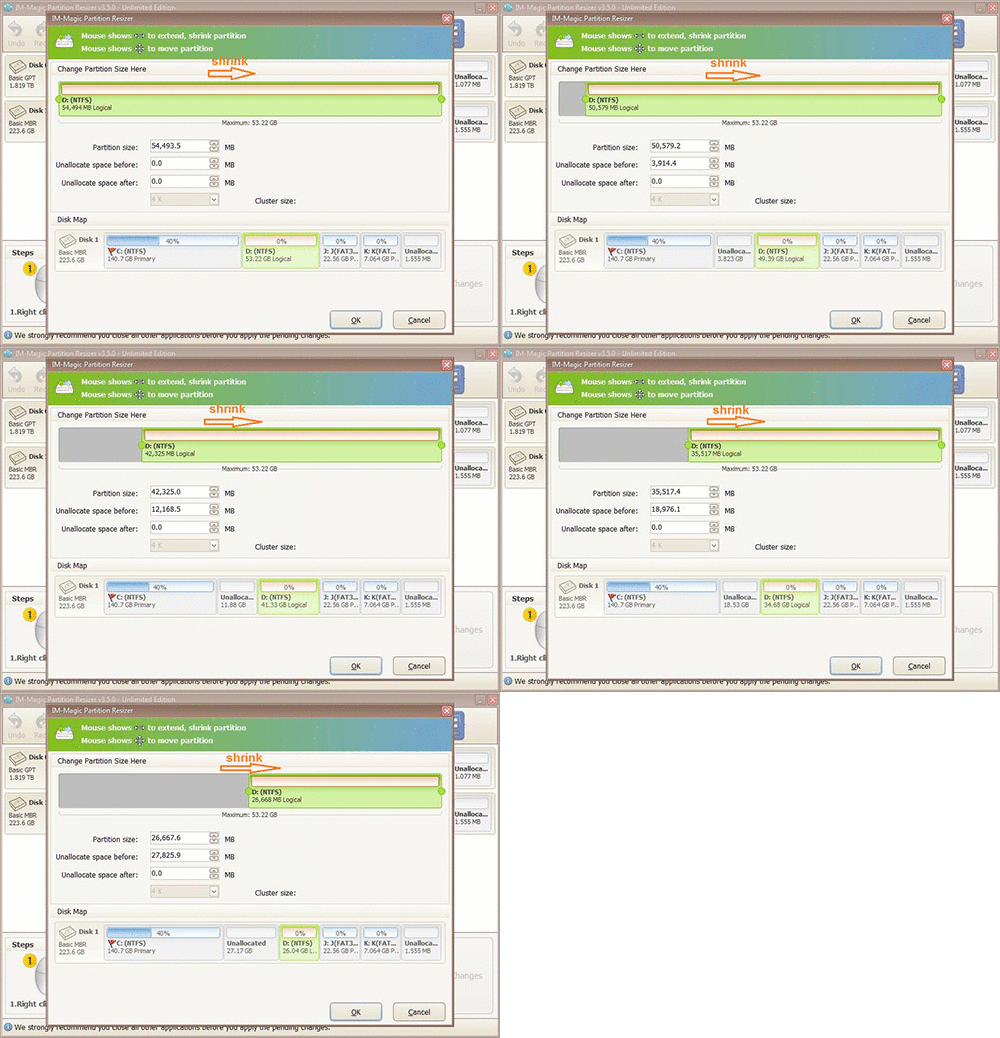
Step-2 Right click the large volume to produce unallocated free space.

Steps to resize your disk partition
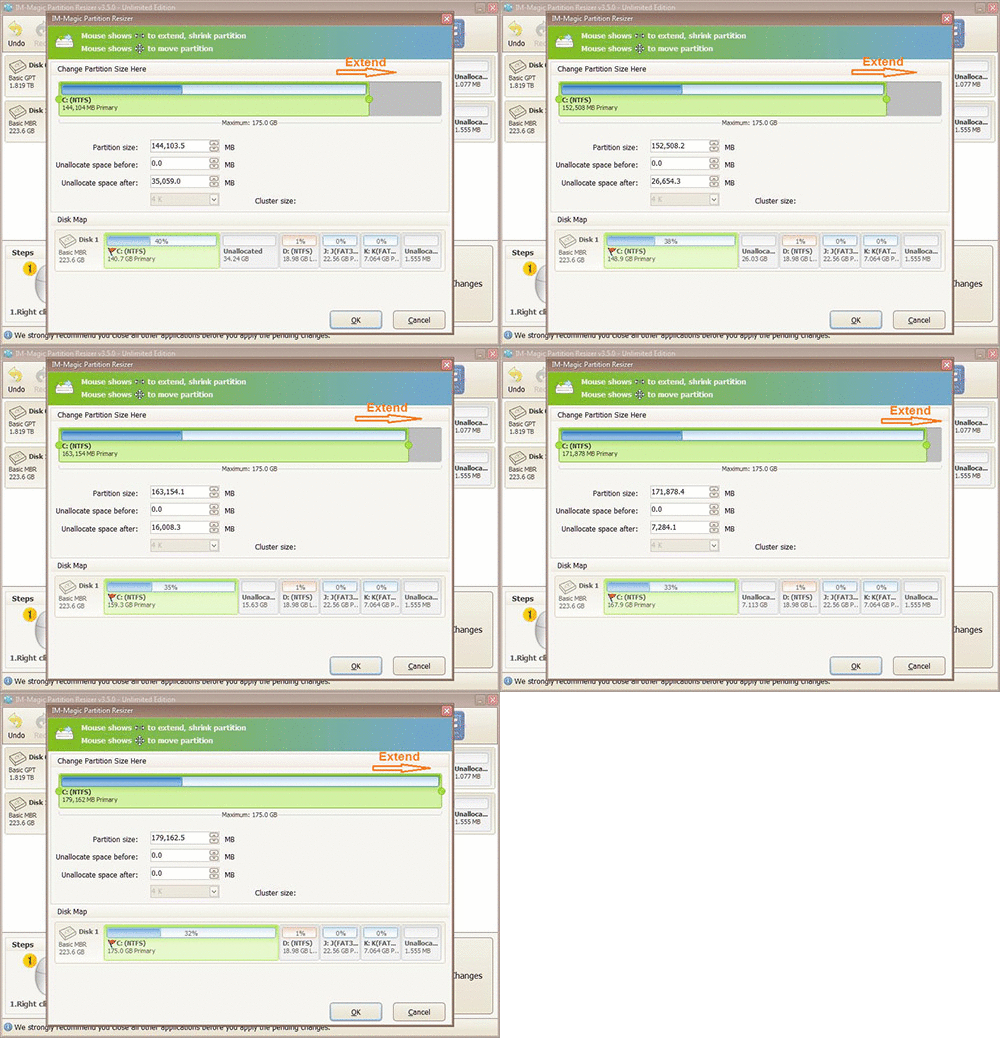
Step-3 Then right click c and drag the border to acquire the free space.

Steps to resize your disk partition
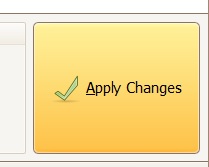
Step-4 Apply the changes.
More Related Articles You May Like
Related Product
- IM-Magic Partition Resizer Server - Partition space redistributing software that works for Windows Server 2003-2025.

