How to Delete Temp Files in Windows Server 2012 R2?
Summary
Is your C drive full of unnecessary files? This page explains how to delete temp files and free up space on the C drive in Windows Server 2012 R2.
Table of Contents
- How to Delete Temp Files in Windows Server 2012 R2 (May free up several GB)
- Does Disk Cleanup Work?
- Move the Pagefile.sys to a Different Partition (May free up several GB)
- How to Resize the C Drive in Windows Server 2012 R2 Without Losing Data (Potentially unlimited space)
How to Delete Temp Files in Windows Server 2012 R2 (May Free Up Several GB of Space)
Learning how to delete temp files in Windows Server 2012 R2 is a valuable skill. It can make a significant difference in freeing up space, and the best part is you can customize it to meet your needs. While there's no one-size-fits-all solution, finding the right approach can yield great results. The advantage of learning how to delete temp files is that there are multiple methods available.
However, depending on how the server is used, you may or may not be able to delete certain files, especially if they are in use. It’s important to check beforehand to avoid any potential issues.
If you continue to experience space issues, you can also extend your C drive to resolve the problem more easily.
Way 1: Delete Temp Files Using Disk Cleanup (Applicable for Any Drive, Including C)
- 1. Open "This PC" and right-click the C drive. Select "Properties."
- 2. In the "Properties" tab, click on "Disk Cleanup."
- 3. Select the suggested files to clean and free up space on the C drive.
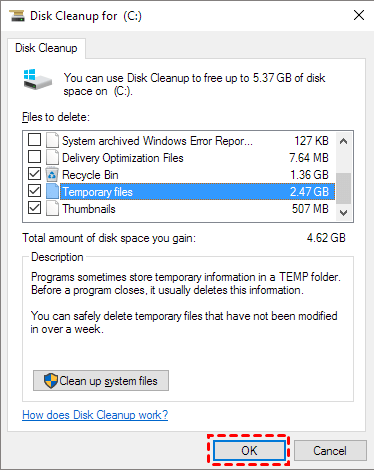
Is Disk Cleanup not installed on Server 2012? Follow these steps to enable it:
- Open Server Manager.
- Click on Add Roles and Features.
- Select Features from the list.
- Check Desktop Experience and click Install.
- Once installed, restart the server.
- Go to
C:\Windows\System32and locatecleanmgr.exeto launch Disk Cleanup.
Also read: How to Enable Disk Cleanup in Server 2012
Way 2: Run cleanmgr in CMD with Admin Privileges
- Step 1: Press Windows + R on your keyboard, type cleanmgr, and press Enter.
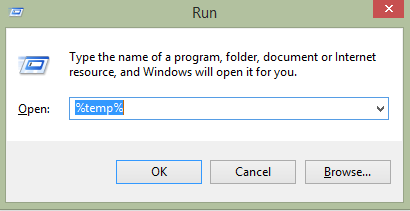
- Step 2: Select the C: (or other) drive from the drop-down list and click OK.
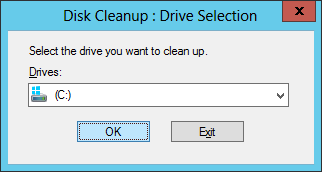
Also read: How to Run Disk Cleanup for Server 2012
Does Disk Cleanup Work?
Most of the time, Disk Cleanup should work. However, in the case of Windows Server 2012, your files are often in use, which can prevent certain files from being cleaned. Therefore, it’s important to understand how to remove these files manually if necessary. While it may be a bit of a hassle at first, it’s worth the effort to learn how to manage temp files more efficiently. It’s a good idea not to rely solely on Disk Cleanup, as it may not always provide the best solution for freeing up space.
Note: Deleting temp files or using Disk Cleanup may only free up several GB of disk space. If you need more space on your C drive, IM-Magic Partition Resizer Server can help redistribute unlimited GB from another drive (or unallocated space) to your C drive.
Move the Pagefile.sys to a Different Partition (Save Space from MB to Several GB)
If you move the pagefile, you will notice that it prevents the creation of new temp files for a while, allowing you to delete the old ones. This is a great way to free up space. Here are the steps to change the PAGE file location from the C drive to another drive:
- 1. Open the Run dialog and go to Settings.
- 2. Navigate to About > Advanced System Settings.
- 3. In System Properties, click Performance > Settings.
- 4. In Performance Options, click Advanced > Change.
- 5. Under Virtual Memory, select No paging file and click Set.
Click YES in the pop-up message box to confirm disabling the paging file.
You can also choose to move the pagefile to the D drive instead of disabling it entirely.
Video: How to change the pagefile location from the C drive to another drive:
How to Extend the C Drive in Windows Server 2012 R2 to Add 100 GB or More?
The most direct solution is to resize the partitions to allocate more space to your C drive. You can use partition management software for this task. Both the IM-Magic Partition Resizer Server edition and the Unlimited edition are excellent tools for extending the C drive in Windows Server 2012 R2. Here are the steps:

Steps to Extend C Drive in Windows Server 2012 R2:
- Step 1: Install IM-Magic Partition Resizer
Download and install the IM-Magic Partition Resizer Server edition on your server. You can obtain the software from the link above. - Step 2: Right-click on the Large Volume
Open the software and locate the large volume from which you want to shrink space. Right-click the volume and select "Resize" or "Shrink" to free up space for the C drive.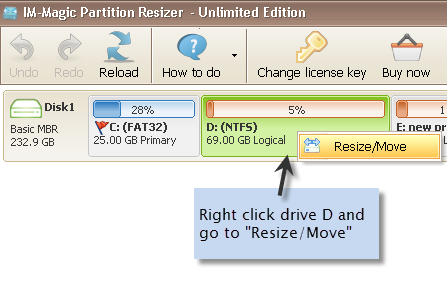
- Step 3: Adjust the Partition Size
A slider will appear allowing you to adjust the size of the selected partition. Slide the bar to shrink the partition and free up unallocated space. Be sure to leave enough space for the existing data on the partition.
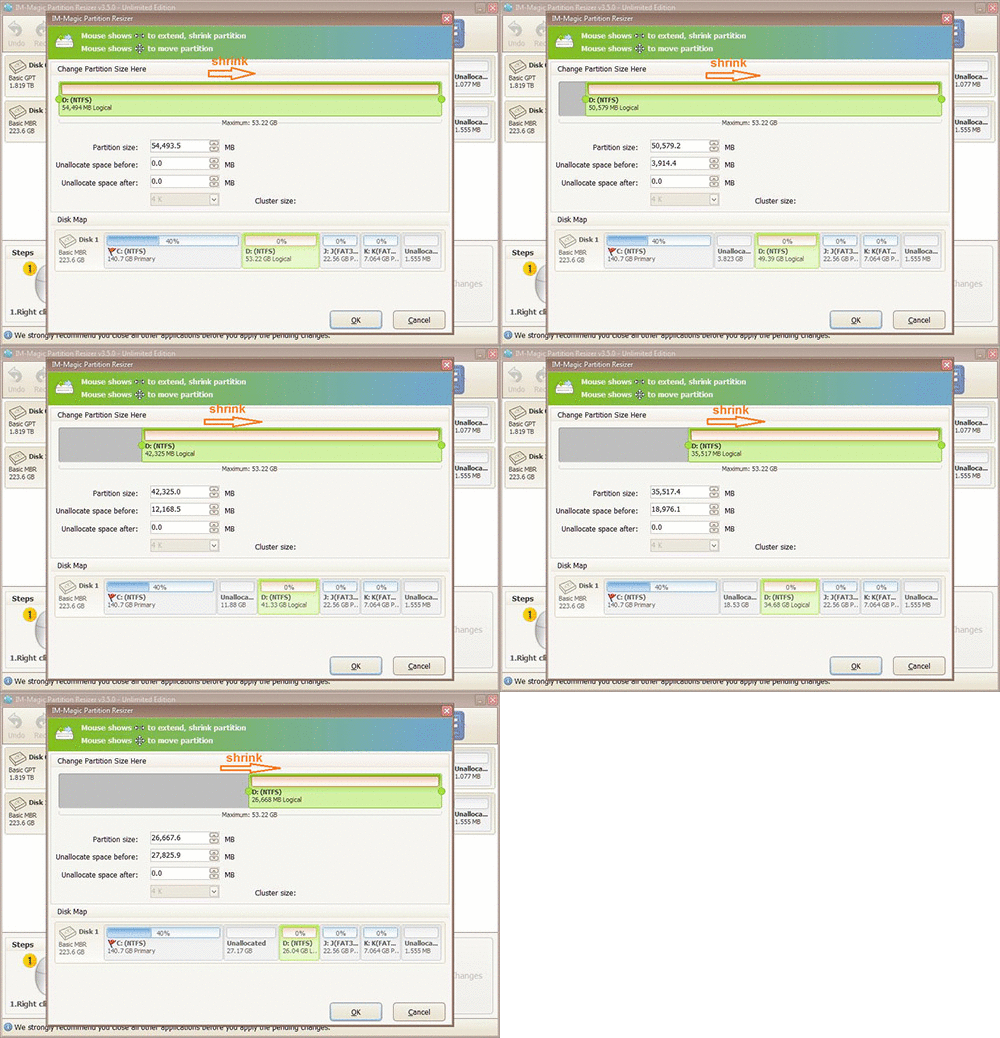 Resize partition on Server 2012 R2 without data loss
- Step 4: Move the Partitions
Once the partition is shrunk, move the unallocated space next to the C drive. This can be done by selecting the "Move" or "Shift" option to adjust the layout of your partitions.
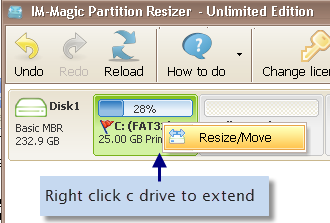
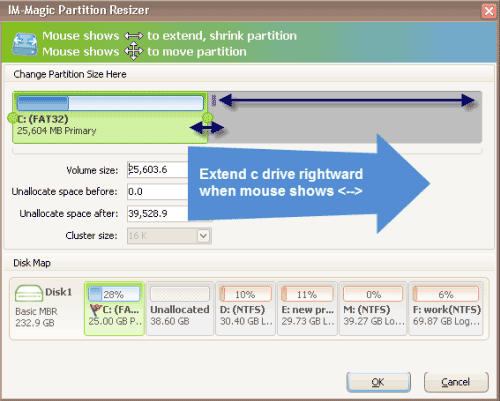
- Step 5: Extend the C Drive
Now that you have unallocated space next to the C drive, right-click on the C drive and select "Extend Volume." The software will allow you to extend the C drive using the newly freed-up space.
- Step 6: Apply Changes
Once you have configured the new partition layout, click "Apply" to make the changes. The software will resize your partitions without any data loss, and your C drive will now have the additional space.
After following these steps, your C drive should now have more space, potentially adding 100 GB or more, depending on how much space you freed up from the other partition. This method is safe and easy to perform without data loss, making it an ideal choice for extending your C drive.
For detailed instructions and troubleshooting, you can watch the video tutorial below:
Video Tutorial: Resize Partitions with Partition Tool
Using IM-Magic Partition Resizer Server edition and IM-Magic Partition Resizer Unlimited edition for this task is simple and convenient. You will get excellent results, and all you need to do is download the app now. It makes the process easier, and you won't have any problems handling temp files properly.
Also read: How to Extend the C Drive for Windows Server 2012
More Related Articles You May Like
Related Product
- IM-Magic Partition Resizer Server - Partition space redistributing software that works for Windows Server 2003-2022.
