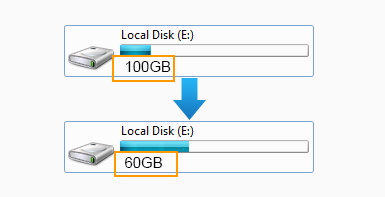
How to Shrink a Partition (Including C Drive) on Windows 11/10/8/7
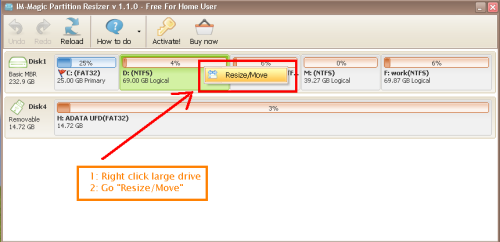
- 1. Right click the partition and select option "Resize/Move"
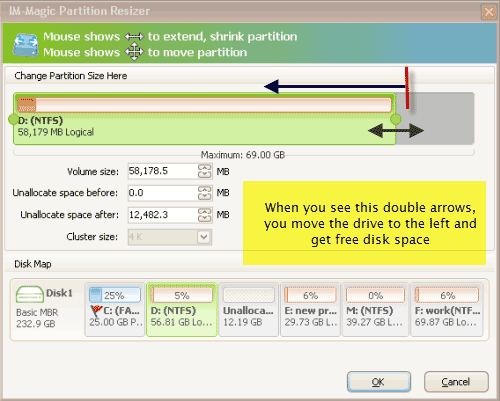
- 2. Drag the border left or right to create unallocated/free space
- 3. Click 'Apply Changes'
Steps

Content Navi
Free Disk Space:
If you want to shrink a partition which has a lot of free space, you may use IM-Magic Partition Free, which is able to make a volume smaller without losing a file on the drive for free.
Free space VS Unallocated space
Shrinking a primary partition, you will get unallocated space after the shrinking volume.
Shrinking a logical partition, you will get free space that cannot be added to a volume. You need to delete the free space to convert it unallocated space.
What can you do with the unallocated space?
- Add it to another volume using IM-Magic Partition Resizer
- Move unallocated space or change the location of the unallocated space using IM-Magic Partition Resizer
- Create a volume on the unallocated space
#1 Steps to Shrink a Volume without Losing Data, including the FAT32 Partition
Partition Resizer can shrink any partition without losing data including the C drive. Here we will make an exmpale of shrinking the Drive.
For Windows 11/10/8/7 => Download Partition Resizer Free [100% Free]
For Windows Server 2025-2003 => Download Partition Resizer Server [Free Demo]
Preparations: Download, install and open Partition Resizer.
Step 1:
Right click the partition which you want to shrink, and go to "Resize/Move" option

Step 2:
At the "Resize/Move" screen, place your computer mouse to the edge of its partition. When the mouse shows <->, you may shrink it by narrowing its edge

Step 3:
Free disk space is the fresh air that you need to add it to another space to get expanded. The UNALLOCATED SPACE shall be right at the side of the partition you want to expand. You can make it by moving other partitions. (You may right click the partition to move by "Resize/Move" function too.)

What you can do later?
- Move the unallocated space using Partition Resizer without losing data by right-clicking the in-between partition, select 'Resize/Move' to move the whole volume and then the location of the unallocated space will be modified without losing data.
- Create a new volume with the unallocated space.
- Add the unallocated space to another drive.
More guide after shrinking a drive
Case#2 Shrink C Drive without Losing Data
The following video shows how to shrink the c drive without losing data using free tool IM-Magic Partition Resizer.
