How to Reclaim Disk Space in Windows 11/10/8/7 with Freeware
Summary
C drive in low disk space? You can reclaim disk space or manage partitions with partition freeware without formatting.
Table of Contents
How to Reclaim Disk Space After Windows 10/11 Update
Does your computer show a low disk space warning? Are you looking to extend the disk partition or reclaim storage for free? Here’s a comprehensive guide to help you free up, manage, and optimize your disk space effectively after a Windows update.
Disk space often becomes scarce due to system updates, temporary files, or improper storage management. Follow these proven strategies to reclaim space safely and efficiently.
1. Remove Temporary Files Using Disk Cleanup Tools
Temporary files, cache, and unused programs can quickly consume your disk space. Here’s how to clean them up:
Manual Cleanup:
- Open File Explorer and navigate to the C: drive.
- Go to the "Windows" folder and locate the "Temp" folder.
- Press Ctrl + A to select all files, then press Shift + Delete to permanently delete them.
Note: You may encounter files that cannot be deleted because they are in use. Skip these files.
Using Disk Cleanup:
- Press Win + R, type
cleanmgr, and press Enter. - Select the drive (usually C:) to clean up.
- Check the file categories to delete, such as Temporary Files, Recycle Bin, and System Files.
- Click "OK" to delete the selected files.
Advanced Tools:
For deeper cleaning, consider trusted third-party tools like:
- CCleaner: A user-friendly tool for cleaning temporary files and system junk.
- BleachBit: Open-source software for advanced system cleanup.
Tip: Always review the files selected for deletion to avoid accidentally removing important data.
2. System Tools to Resize Disk Volume in Windows
If cleaning up files doesn’t provide enough space, resizing disk partitions is a great option. This process reallocates space from one partition to another, such as increasing the size of your C: drive.
Using Disk Management:
- Right-click "This PC" and select "Manage."
- Open "Disk Management" from the left-hand menu.
- Right-click a partition with free space and select "Shrink Volume" to create unallocated space.
- Right-click the C: drive and choose "Extend Volume" to add the unallocated space.
Note: This method works only if your file system is NTFS and there’s adjacent unallocated space.
Troubleshooting:
- If the "Extend Volume" option is grayed out, ensure you have unallocated space directly next to the C: drive.
- Consider using third-party tools (see below) if the built-in options are insufficient.
Using Command Prompt (DiskPart):
The Command Prompt allows advanced disk management, but it requires caution:
- Press Win + R, type
cmd, and press Enter. - Type
diskpartto enter the DiskPart utility. - Run the following commands:
list volume- Displays all disk volumes.select volume X- Replace X with the volume number to modify.extend size=XXXX- Replace XXXX with the size (in MB) to add.
- Type
exitto close DiskPart.
Warning: DiskPart operations can cause data loss if misused. Always back up your data beforehand.
3. Freeware to Reclaim Disk Space in Windows 11/10/8/7
IM-Magic Partition Resizer is a powerful, free tool designed for easy disk management. It supports resizing, extending, shrinking, and organizing partitions without data loss.
Steps to Use IM-Magic Partition Resizer:
- Download and Install: Get the tool from the official website.
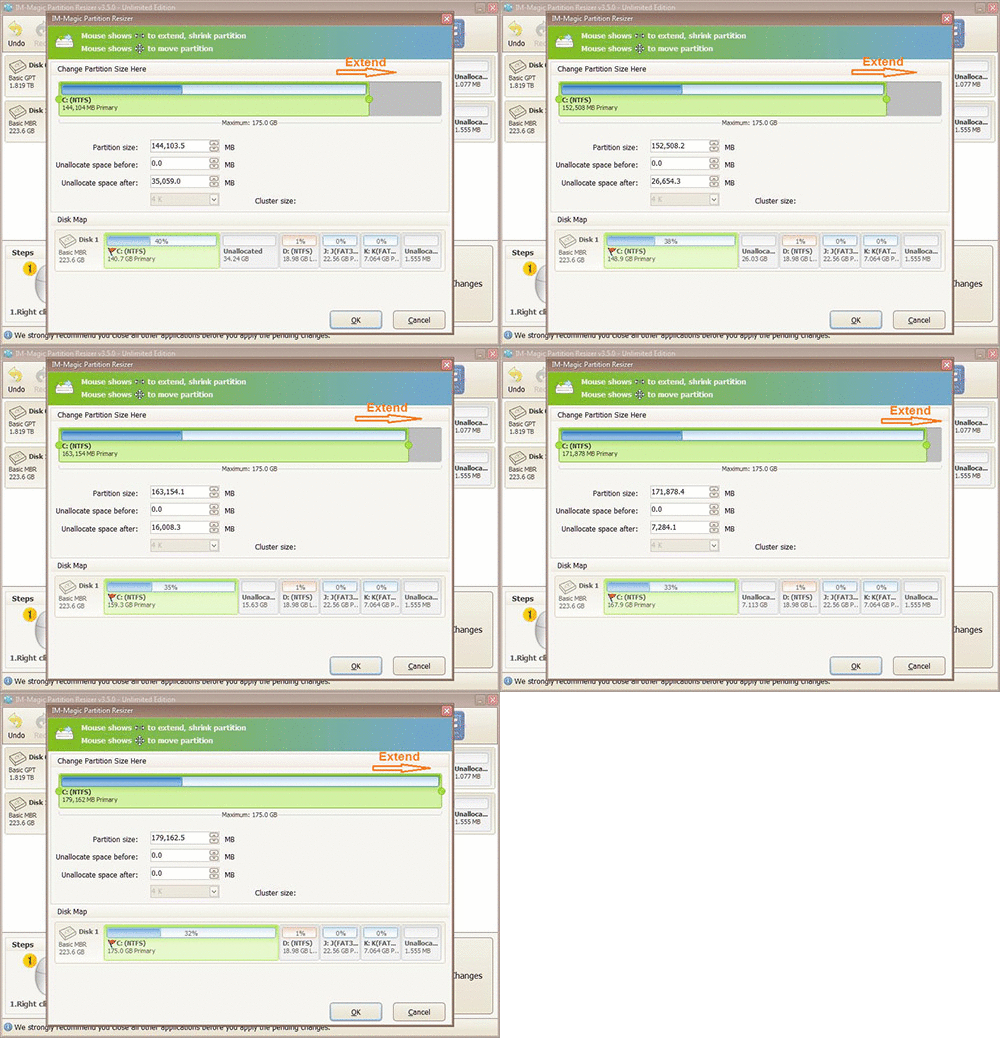
- Shrink a Partition: Select a partition with extra space, right-click, and choose "Resize/Move Partition." Drag to resize and create unallocated space for redistribution.
- Extend the C: Drive: Right-click the C: drive and use the unallocated space to extend it when the unallocated space is just at the right side of the c drive, or you need to right click the in-between volumes to adjust their position to move the unallocated space next to the c drive.
- Apply Changes: Click "Apply" to save the partition changes.
 Steps to reclaim disk space in Windows
Watch the following video.
More video guide here: https://www.resize-c.com/video/
For Windows 11/10/8/7 => Download Partition Resizer Free [100% Free]
For Windows Server 2025-2003 => Download Partition Resizer Server [Free Demo]
Benefits:
- Completely free for Windows 11/10/8/7 users.
- Safe to use with no risk of data loss.
- Supports creating new partitions to better organize your data.
4. Reclaim Disk Space for Windows Server 2003/2008/2012/2016
Server environments require robust tools for disk management. IM-Magic Partition Resizer Server offers advanced features tailored for servers:
- Supports large-scale disk operations with no downtime.
- Ensures data integrity and minimizes risks during resizing.
- Compatible with all major Windows Server versions.
Free Trial:
Tips for Servers:
- Back up critical data before making partition changes.
- Schedule maintenance during off-peak hours to avoid disruptions.
More Related Articles You May Like
Related Product
- IM-Magic Partition Resizer Server - Partition space redistributing software that works for Windows Server 2003-2022.

