[Fixed]The volume you have selected may not be extended on Windows Server 2012/2016/2019/2022
Summary
The Windows system said that “The volume you have select may not be extended”? Don’t worry, you can easily extend the volume without data loss.
Table of Contents
Server 2003/2008/2012 the volume you have selected may not be extended
Windows Server 2003/2008/2012 is considered as the best operating system for office use. The added features, continuous updates, and office-oriented tools provided in the SBS (small business server) makes it stand out to other operating systems. However, these features and updates can consume GBs of data and you may end up with low disk space problems.
If you use Diskpart to extend volume, it may report "The volume you have selected may not be extended"
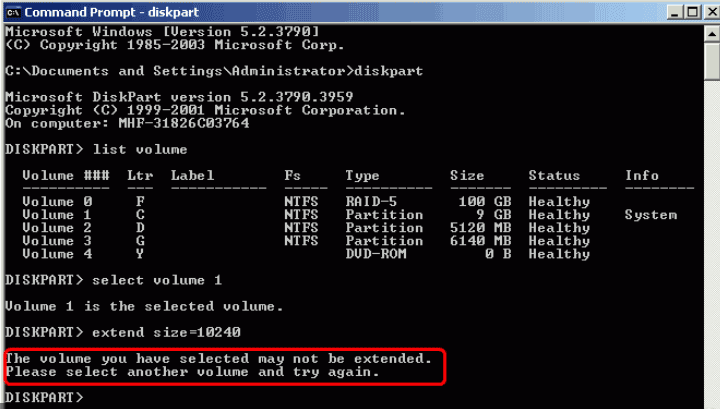
Why? Here are most common causes when Diskpart fails.
- No Unallocated Space: If there's no unallocated space directly adjacent to the right side of the volume, extending it simply isn’t possible. => You need to delete the right side volume to create contiguous unallocated space. (You may use free tool IM-Magic Partition Resizer to clone the whole volume to another place before the deletion)
- File System Limitation: The volume is formatted with the FAT32 file system, and Diskpart can only work its magic on NTFS volumes.
- Boot Drive Restriction: If the volume you’re trying to extend is the boot drive (typically C:), Diskpart can’t help you out while the system is running. It’s a bit like trying to fix a car engine while driving!
- MBR Partition Table Limit: If the drive uses the MBR partition table format, there’s a 2TB ceiling. Diskpart can’t extend volumes beyond this size.
- Dynamic Disk Set: Got a striped or spanned dynamic disk set? Unfortunately, Diskpart can’t extend these types of volumes.
- Write Protection or Lockdown: If the disk is write-protected or locked, it’s like trying to edit a document that’s read-only—you won’t be able to make any changes.
- System/Recovery Partition: Extending system or recovery partitions is often off-limits due to operating system restrictions.
- Snapshots or Shadow Copies: Active snapshots or shadow copies on the volume might be standing in the way, blocking any attempts at resizing.
- Corruption or Errors: File system corruption or disk errors? Diskpart can’t extend a volume when something’s gone wrong under the hood.
#1: Resize Server Partition/Volume Using Disk Management Tool
Terms and Conditions: Deleting right side partition is required to produce adjacent unallocated space.
- The drive must be NTFS
- The drive cannot exceed 2TB if it uses MBR partition style
- The volume is NOT part of a striped or spanned dynamic disk set
- The disk is NOT write-protected or locked
To manage drives in Windows Server 2019 for example, using Server Manager, including shrinking drive D, creating a new drive E, copying files from D to E, deleting drive D, and extending drive C, follow these steps carefully. Note that you should always back up your data before making changes to disk partitions.
Step 1: Open Disk Management
- Open Server Manager: Click on the Start button, and select Server Manager from the menu.
- Access Disk Management:
- In Server Manager, click on Tools in the upper right corner.
- Select Computer Management from the dropdown menu.
- In the left pane, expand Storage and click on Disk Management.
Step 2: Shrink Drive D
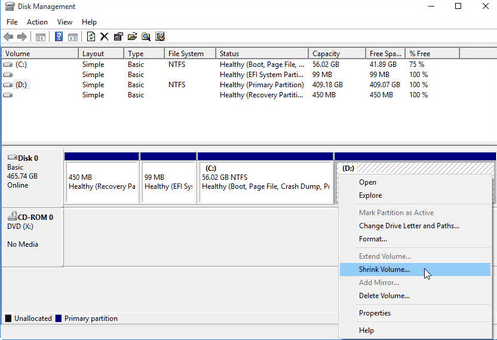
- Locate Drive D: In the Disk Management window, find the partition labeled D.
- Right-click on Drive D: Select Shrink Volume from the context menu.
- Specify the amount to shrink:
- A dialog box will appear showing the total size of D and the available shrink space.
- Enter the amount of space to shrink in MB (this will be the size of the new drive E).
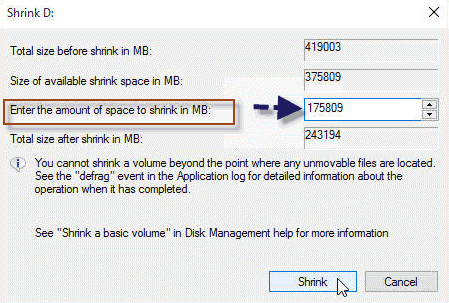
- Click Shrink.
Step 3: Create New Drive E
- Unallocated Space: After shrinking, you will see unallocated space on your disk.
- Right-click on the unallocated space: Select New Simple Volume.
- New Simple Volume Wizard:
- Click Next.
- Specify the volume size (use the default for all available space or a specified amount).
- Click Next.
- Assign Drive Letter: Choose E as the drive letter and click Next.
- Format the Partition:
- Choose to format the volume (NTFS is recommended).
- Optionally, label the volume (e.g., "New Drive E").
- Click Next and then Finish.
Step 4: Copy Files from D to E
- Open File Explorer: Click on the Start button and select File Explorer.
- Navigate to Drive D: Browse to the files and folders you want to copy.
- Select Files: Highlight the files or folders you wish to copy.
- Copy Files: Right-click on the selected items and choose Copy.
- Navigate to Drive E: Click on Drive E in File Explorer.
- Paste Files: Right-click in Drive E and select Paste.
Option: Clone partition to another drive E from D using IM-Magic Partition Resizer.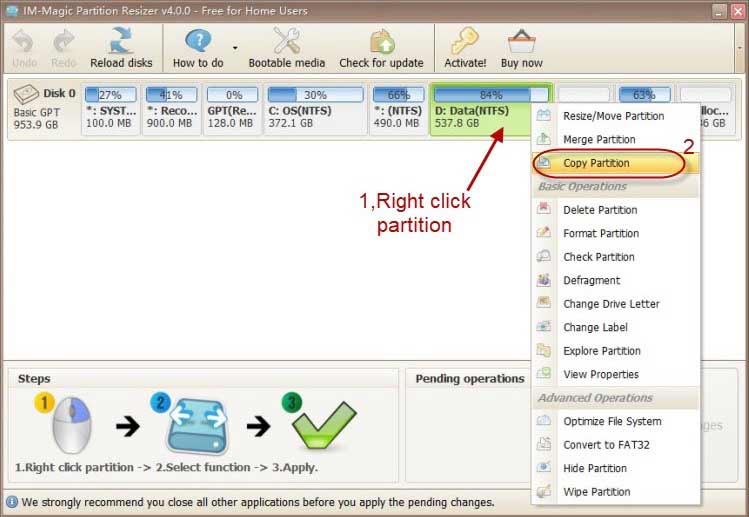
Step 5: Delete Drive D
- Return to Disk Management: Go back to the Disk Management window.
- Right-click on Drive D: Select Delete Volume.
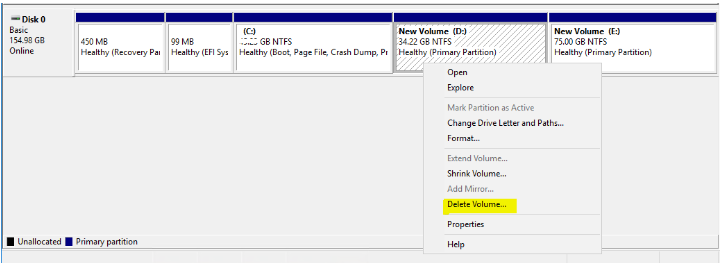
- Confirm Deletion: Click Yes to confirm. This will convert Drive D into unallocated space.

Step 6: Extend Drive C
- Locate Drive C: Find the C drive in Disk Management.
- Right-click on Drive C: Select Extend Volume.
- Extend Volume Wizard:
- Click Next.
- Select the amount of space to add from the unallocated space (which was previously Drive D).
- Click Next and then Finish.
Final Notes
- Backup: Ensure you have a backup of important files before proceeding, as deleting volumes can lead to data loss.
- Restart: Consider restarting your server after making these changes to ensure everything is functioning correctly.
By following these steps, you will successfully manage your drives in Windows Server 2019. If you encounter any issues, check for potential errors in the Disk Management tool and consult Microsoft documentation or forums for further assistance.
Not working? Try the following tool that offers better disk management for resizing disk volumes without losing data.
#2 Resize Disk Volume Using IM-Magic Partition Resizer Server
Video: How to manage disk partitions without losing data
For Windows 11/10/8/7 => Download IM-Magic Partition Resizer Free (100% Free)
For Windows Server => Download IM-Magic Partition Resizer Server (Free Demo)
IM-Magic partition Resizer is one of the best disk management tool for Windows system to offer disk management like resizing partition, shrinking partitions, moving partitions, and extending partitions without losing data. OS and data are totally untouched.
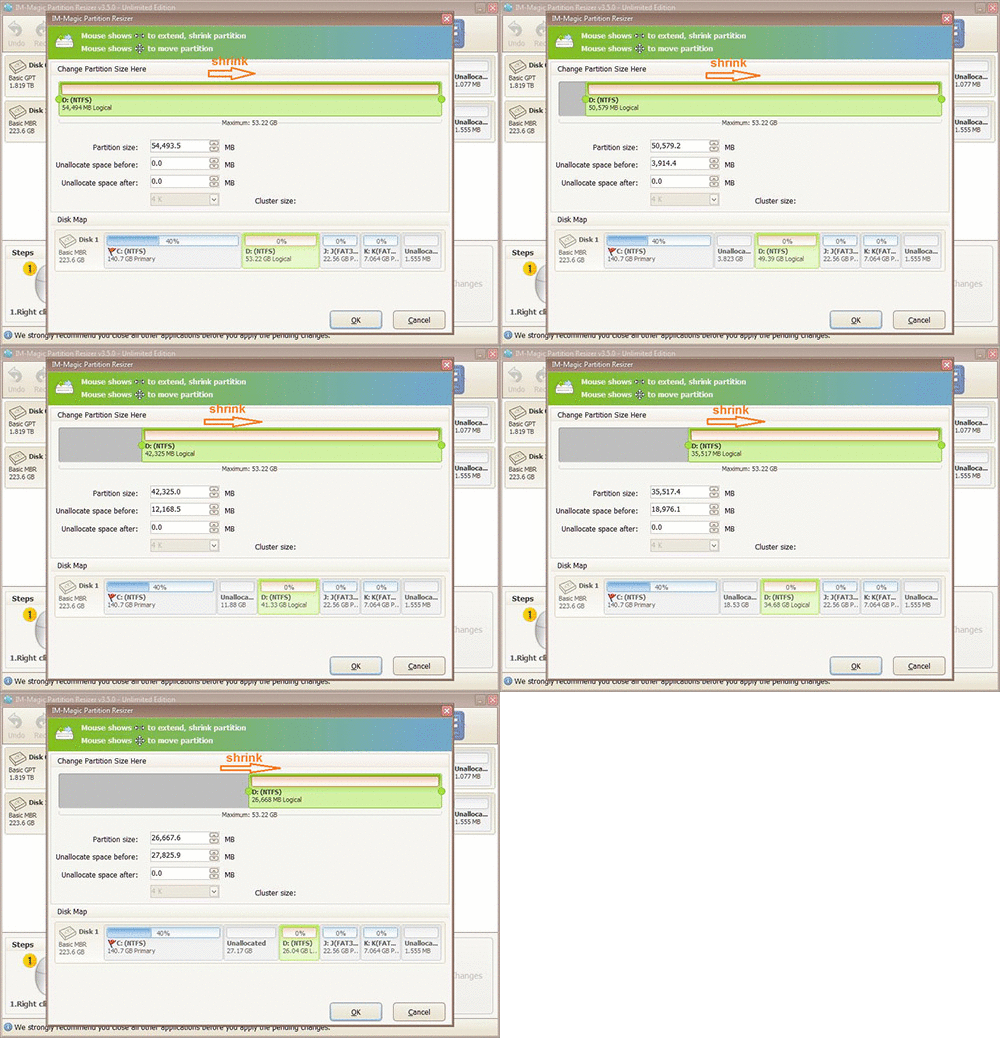 Resize Disk Volume Using IM-Magic Partition Resizer
If there is another partition between c-drive and unallocated space, open that partition and move the unallocated space to the left.
When the unallocated space becomes adjacent to c-drive, right click C-Drive and click “Resize/Move”. Extend the c-drive by acquiring the grayed-out space.
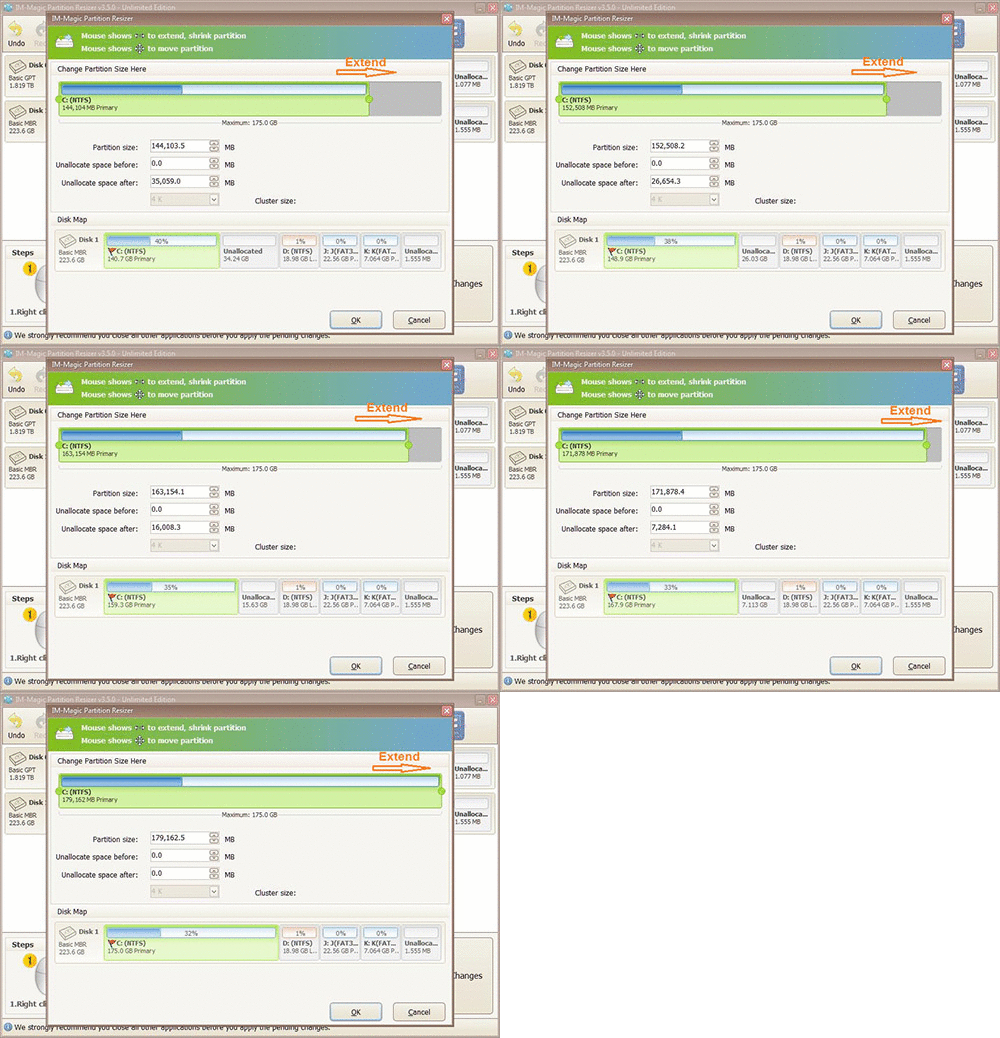 Resize Disk Volume Using IM-Magic Partition Resizer
Note that only the IM-Magic Server and Unlimited edition can be used for Windows Server all editions including SBS, while the Free and Professional editions are used for Windows 7/8/10, Vista, XP etc.
Related Product
- IM-Magic Partition Resizer Server - Partition space redistributing software that works for Windows Server 2003-2022.
