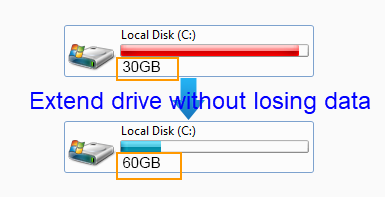
How to Extend System C Partition without Losing Data

IM-Magic Partition Resizer
- 1. Produce unallocated space – shrink a large volume and move the unallocated space
- 2. Reallocate free disk space – move partitions to redistribute free space
- 3. Add free space to a small partition – extend the C volume
The Key: Unallocated Space

Condition: Unallocated space is needed, or you may also merge adjacent partitions into C
In order to expand a partition, there must be some unallocated space, which can be created by shrinking free disk space. This guide explains how to create unallocated space and then redistribute disk space from one partition to another without losing data.
Note: You can also get unallocated space by adding a new disk to the computer and then building a RAID array to use the newly added space from another disk. (Only with RAID can you use disk space from another disk.)
Video #1: Shrink D/E/F to expand the C drive without losing data
Video #2: Merge C and D/E drives with/without a Recovery Partition
Details here: How to merge C and D/E drives
For Windows 11/10/8/7 => Download Partition Resizer Free [100% Free]
For Windows Server 2025-2003 => Download Partition Resizer Server [Free Demo]
Three Steps to Perform:
One: Find the large volume with a lot of free space and shrink it to create free space (If it's on the same disk). If there is already unallocated space on the disk, you may proceed directly to the second step.
Two: Move the free disk space to the drive that needs to be expanded by moving other partitions safely.
Three: Expand the volume – for example, the System C drive.
Video Tutorial: How to Expand the C Drive
Photo Tutorial: Partition Resizer to Produce Free Disk Space and Expand the C Drive
Note: If there is already unallocated space on your disk, you can go directly to Step 3 to move the unallocated space close to the system partition, or Step 4 to expand the system partition by right-clicking it and dragging its border to claim the adjacent unallocated space if it's contiguous to the system drive.
Step 1: Produce unallocated space
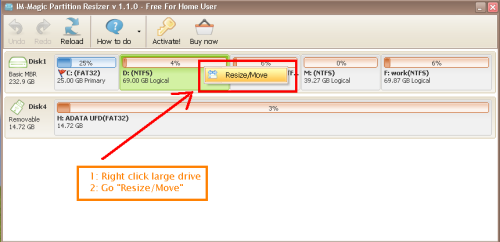
Right-click the large volume you want to shrink to create some unallocated space, and select "Resize/Move".

Step 2:
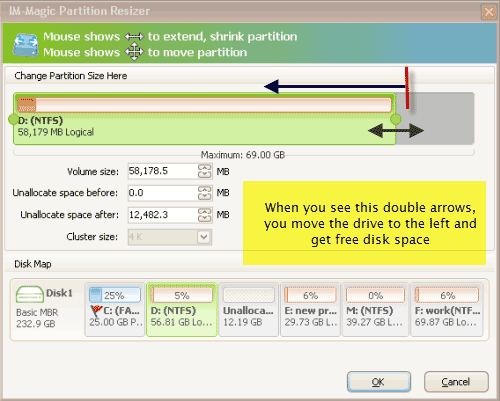
After selecting "Resize/Move", shrink the volume by dragging the double arrows left or right. You will then see the free unallocated space.

Step 3:
If the free disk space is not on the right side of the drive you want to expand, you need to move it by relocating other partitions. In this case, move volume D to exchange places with the free space.


Step 4:
Now, the free disk space is adjacent to the boot drive. Right-click the C drive to expand it.

Step 5:
Apply changes to extend the drive.

Extend System Drive with Disk Management
If there is contiguous unallocated space next to the C NTFS drive, you can use Disk Management to extend it.
Step 1: Right-click on the C drive in Disk Management and choose the "Extend Volume" option.

Step 2: In the "Extend Volume Wizard" window, click the "Next" button.

Step 3: Specify the amount of space you want to add to the C drive and click "Next".

Step 4: Finally, click "Finish" once the unallocated space has been successfully added to the C drive in Windows 7.

Disk Management might not extend the volume if:
- The C drive uses the FAT32 file system.
- There is no contiguous unallocated space immediately to the right of the C drive.
- The unallocated space is from a logical drive, while the C drive is a primary partition.
- The C drive is on an MBR disk that has reached its 2TB limit, even if the total disk size is larger (e.g., 4TB).
- The unallocated space is not on the same disk if RAID is not being used.