Convert FAT32 to NTFS with/without Formatting
If a hard disk partition or removable disk was formatted with the FAT32 file system, you may find that you cannot save a single file larger than 4GB to the FAT32 drive. Why? Well, this is due to the limitation of the FAT32 file system, which only supports single files smaller than 4GB. In addition, the performance of the FAT32 file system is not as good as the NTFS file system.
Therefore, it is recommended to format your hard disk drive with the NTFS file system when partitioning an internal hard drive on your computer. However, when you buy a new computer or USB flash drive, it might already be formatted with the FAT32 file system. So, is there anything you can do to convert FAT32 to the NTFS file system?
Quick Navigation
Way 1 - Change FAT32 to NTFS Without Formatting Using Convert CMD
It's completely safe to convert a FAT32 drive to NTFS on Windows computers using the convert command, and no data will be removed.
The command: convert G: /fs:NTFS (G should be replaced by the drive letter of your drive. For example, if your D drive needs to be converted to NTFS, type: convert D: /fs:NTFS, and then press the Enter key).
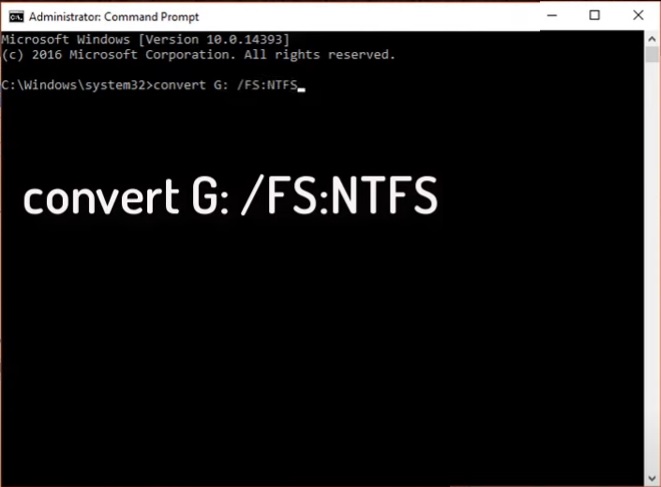
Note: Converting FAT32 to NTFS using CMD does not result in data loss. However, converting NTFS back to FAT32 without data loss is not possible. To change NTFS back to FAT32 without losing data, you can use the free tool Partition Resizer.
Video - How to Convert FAT32 to NTFS Without Formatting
The Question: How to Convert the OS C Drive from FAT32 to NTFS?
The Problem: The command prompt convert method will not work on the OS C drive.
The Truth: There is no way to convert the FAT32 C drive to NTFS using either Windows built-in tools or third-party tools. Not only is conversion impossible, but formatting the C drive also won't work.
Alternative Solution: Want to expand the C drive in FAT32? You can redistribute disk space for the FAT32 C drive using the free tool IM-Magic Partition Resizer without losing data.
Extend C Drive Without Converting It to NTFS
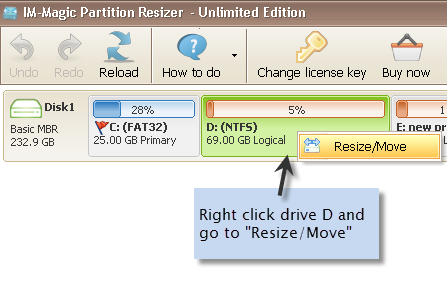
Step 1: Download Partition Resizer Free, install it, and open it. Create unallocated space by shrinking a large volume: Right-click the large volume and choose "Resize/Move."
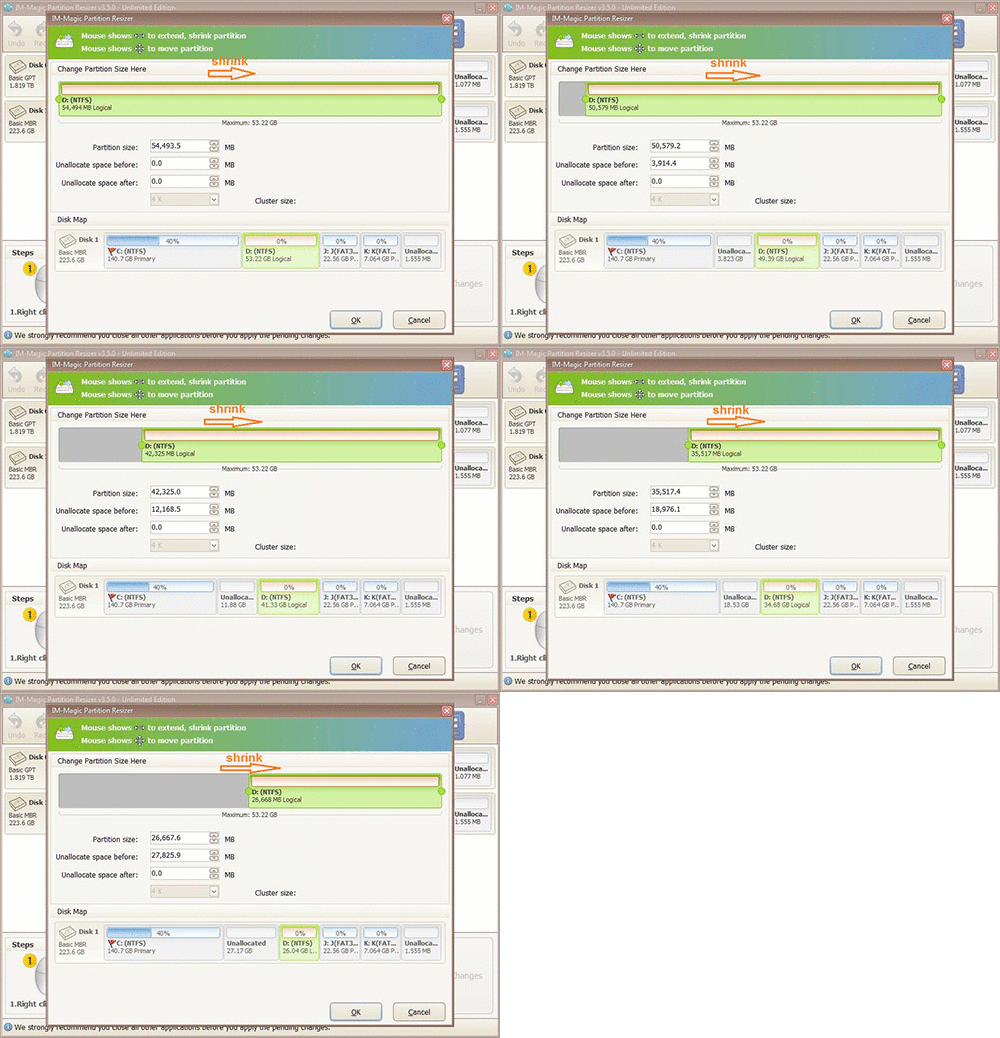
Step 2: Move the border of the large drive from left to right to create unallocated space on the left side, or move the border to the left to create unallocated space on the right side.
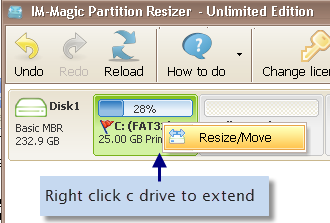
Step 3: Right-click the C drive and choose "Resize/Move." Extend its right-side border to claim the unallocated space.
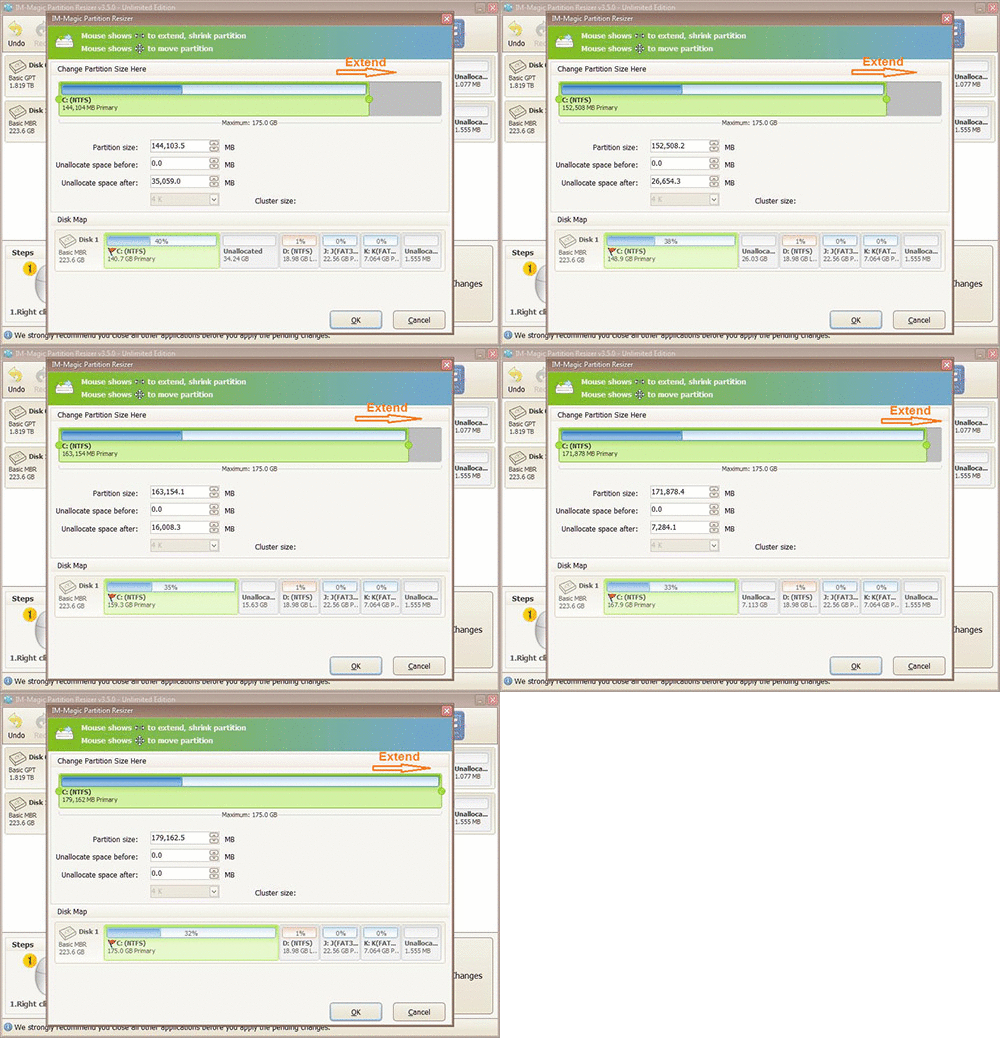
Step 4: Move the arrows to add the unallocated space to the C drive. Click the "Apply" button. 
4 Ways to Convert FAT32 to NTFS by Reformatting (Non-OS Drive)
On any Windows computer, both FAT32 and NTFS file systems are supported on local disk drives or removable disks. If you want to reformat an internal or removable disk from FAT32 to NTFS for free, you can select any of the methods below:
Tip: Please back up your data in advance, as reformatting will wipe the device. The free tool Partition Resizer has the Clone Disk and Copy Partition functions for data backup.
1. Reformat Internal/Removable Disk from FAT32 to NTFS in My Computer
Step 1: Right-click the disk that has the FAT32 file system and select the Format option.

Step 2: Select NTFS under the file system section and then click the Start button.

2. Reformat Disk in Disk Management
You can open Disk Management on your computer and right-click the FAT32 drive to format it to the NTFS file system.


==> Please visit the following links to access Disk Management:
3. Use Diskpart Command to Reformat Disk from FAT32 to NTFS
Follow the guide below to run the Diskpart command to format a disk to NTFS:
Step 1: Type Diskpart after running Command Prompt.

Step 2: Type list disk and then enter select disk 0, 1, 2… (It depends on the disk you want to format).

Step 3: Type list volume and then enter format fs=ntfs label=volume label quick (volume label is the label of the partition you want to format).

4. Free Partition Software to Format Disk Volume from FAT32 to NTFS
IM-Magic Partition Resizer is a free tool that can help back up disk data (Clone Disk or Copy Partition) and then format the disk drive to NTFS.
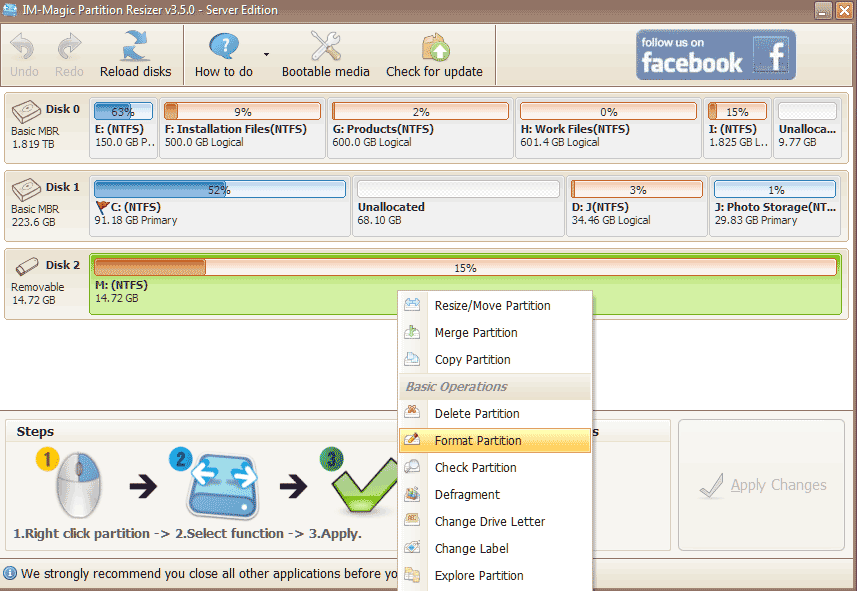

Also read: How to back up a partition for free with Partition Resizer
For Windows 11/10/8/7 => Download Partition Resizer Free [100% Free]
For Windows Server 2025-2003 => Download Partition Resizer Server [Free Demo]
Free to Change FAT32 Drive to NTFS with Command Line
If you want to change a disk to NTFS without formatting, you can run Command Line to execute the conversion task.
Step 1: Methods to Open Command Line
To change a disk from FAT32 to NTFS with Command Prompt, the first step is to open the Command Line.
For Windows XP users – Click the Start button > Run > type cmd and press the OK button.

For Windows Vista / 7 users – Click the Start button > type cmd in the search bar > right-click cmd.exe and choose Run as administrator.

For Windows 8 / 10 users – Press Windows + X keys and select Command Prompt (Admin).

Step 2: Change FAT32 Drive to NTFS with Command Prompt
You need to enter the appropriate command to change the FAT32 drive to NTFS.
Free to Convert USB Flash Drive from FAT32 to NTFS
USB flash drives are available in capacities from 1GB to 512GB. Typically, USB flash drives smaller than 32GB are formatted with the FAT32 file system, while those larger than 32GB are formatted with NTFS.
==> For more details on converting a flash drive from FAT32 to NTFS, please refer to: How to convert flash drive from FAT32 to NTFS
Free to Convert NTFS to FAT32
It is easy to convert FAT32 to NTFS, but it can be more difficult to convert an NTFS drive back to FAT32. Command Line typically does not support converting any partition from NTFS to FAT32. You can try formatting to convert an NTFS partition back to FAT32. If you do not want to format or there is no FAT32 file system option available when formatting, you can use IM-Magic Partition Resizer to change NTFS to FAT32.
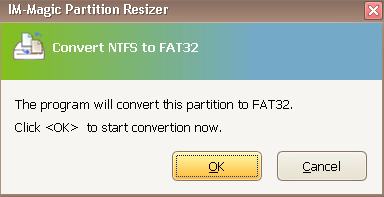
Step 1: Right-click the NTFS partition and select the "Convert to FAT32" option.
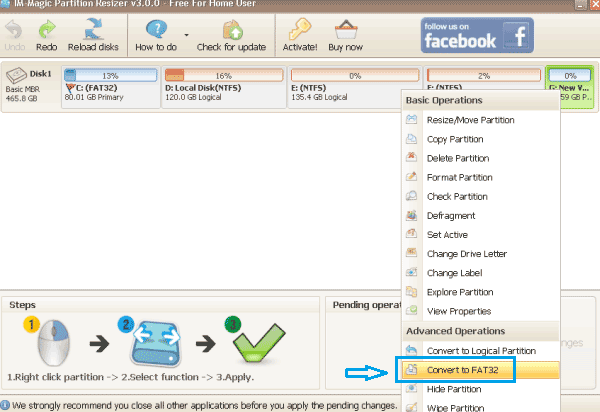
Step 2: Confirm the conversion and click the "Apply Changes" button.
Also read: How to convert ntfs to fat32 without losing data
Last updated on 2024/12/02
More Related Articles You May Like
- windows cannot reformat ntfs drive to fat32 - free to convert hard drive partition from ntfs to fat32 when windows cannot format it to fat32...Read more >>
- how to extend c drive server 2008 - how to convert ntfs to fat32 when command prompt failed to execute the task...Read more >>
- convert ntfs to fat32 windows server - all solutions for partition converting from ntfs to fat32 on windows server 2003 2008 2012...Read more >>
- freeware partition magic to convert file system ntfs to fat32 windows 7 - free download partition magic to convert file system from ntfs to fat32 in windows 7...Read more >>
- convert ntfs to fat32 software for windows 8 - free partition software download for windows 8 to convert ntfs partition to fat32...Read more >>
- windows server 2008 partition software - how to change ntfs to fat32 file system on windows xp for free...Read more >>
- partition magic software convert ntfs to fat32 - free download partition magic for converting ntfs to fat32 partition...Read more >>
- convert ntfs to fat32 windows 10 - free to convert a partition from ntfs to fat32 without reformatting or touching any file...Read more >>
- can you convert ntfs to fat32 file system - how do you convert ntfs partition to fat32 file system on windows computer...Read more>>
- convert ntfs to fat32 without formatting partition - free to convert ntfs partition to fat32 file system without formatting it...Read more >>
Related Product
- IM-Magic Partition Resizer Server - Partition space redistributing software that works for Windows Server 2003-2025.
