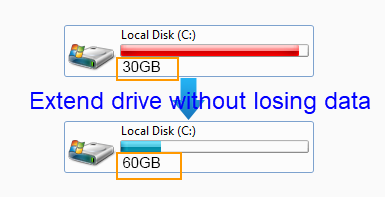
Free Tool to Extend Partition/Volume without Losing Data on Windows 11/10/8/7
Summary
On this page, we will introduce a free partition tool for Windows users to extend volume without losing any data.
Table of Contents
#1 Free Software to Extend Volume without Losing Data, Reformatting Disk or Reinstalling System
100% Free partition software: IM-Magic Partition Resizer Free
Platforms: Windows
What's special:
- No data loss, data and OS totally untouched
- Resize (Shrink/Extend) partition without losing data
- Move partition without losing data (Diskpart or Disk Management cannot do this)
- Move recovery partition (Diskpart or Disk Management cannot do this)
- Move unallocated space location on the same disk without losing data
- Move unallocated space from another disk without losing data if RAID is applied
- Merge partitions without losing data
- Resize partition without losing data even if power surge unexpected happened
- OS and data protection with ROLL-BACK algarythems

System partition is running out of disk space on Windows? Windows Server says low disk space alert message on C drive? Data volume runs on low disk space with lots of important data inside? All these problems can be resolved with third-party partition software IM-Magic Partition Resizer, with which you are able to extend disk volume without touching original data stored on the partition.
How to Extend Partition Step by Step?
For Windows 11/10/8/7: Download IM-Magic Partition Resizer Free (100% Free)
For Windows Server: Download IM-Magic Partition Resizer Server (Free Demo)
#2 Disk Management to Extend Volume under Certain Conditions
Disk Management can help extend a volume without losing data at certain conditions.
- Unallocated space is required at the adjacent right side of the partition you want to expand
- No recovery partition or system reserved partition that stands between the unallocated space and the partition you want to extend
- The partition must be NTFS drive
- Disk Management delete volume and extend volume is not provided in Windows Server 2003
- The unallocated space is on the same disk
Watch the following video to get the idea of extending volume with Disk Management
Also read: How to extend c drive Windows 11
Possible risk of losing data with Disk Management
- You need to delete the right side volume to create unallocated space -> Be free to use free tool IM-Magic Partition Resizer to clone the partition to another place for backup
IM-Magic Partition Resizer VS Disk Management
| Disk Management | IM-Magic Partition Resizer* | |
|---|---|---|
| Extend NTFS Partition with Right Side Adjacent Unallocated Space |  |
 |
| Extend FAT32 Partition | NO |  |
| Move Unallocated Space | NO |  |
| Move Partition | NO |  |
| Move System Reserved Recovery partition | NO |  |
| Delete System Reserved Recovery partition | NO |  |
| Convert Disk GPT without Losing Data | NO |  |
| Clone Disk | NO |  |
| Migrate OS | NO |  |
| Price | FREE | FREE |
| Download | Download for Windows 11-7 (100% Free) Download for Windows Server (Free Demo) |
Extend Partition in Windows&Linux using Fdisk without Losing Data
#Fdisk in Linux: This procedure extends the partition while preserving data, provided you recreate the partition with the same start sector.
To extend a partition (volume) using `fdisk` in Linux without losing data, follow these steps:
1. **Backup Your Data**: This is critical in case of errors.
2. **List Partitions**:
udo fdisk -lIdentify the partition to extend (e.g., `/dev/sda1`).
3. **Open `fdisk`**:
sudo fdisk /dev/sda
4. **Delete the Partition** (without losing data):
- Press `d`, choose the partition number (e.g., `/dev/sda1`), and delete it.- This **won’t delete data** as long as you recreate it with the same start sector.
5. **Recreate the Partition**:
- Press `n` to create a new partition.- Set the **same start sector** and use the desired size (or default for full disk).
6. **Write Changes**:
- Press `w` to write changes and exit.7. **Resize the Filesystem**:
sudo resize2fs /dev/sda1
8. **Reboot**:
sudo reboot
This will extend your partition while keeping the data intact.
#Fdisk Windows: To extend a partition using `fdisk` without losing data, follow these steps carefully:
1. **Backup Your Data**: Even though the steps aim to avoid data loss, backing up important data is crucial in case anything goes wrong.
2. **List Partitions**: Open a terminal and list your partitions with:
sudo fdisk -lIdentify the partition you want to extend (e.g., `/dev/sda1`).
3. **Resize the Partition**:
- 1. Run `fdisk` to modify the disk:
-
sudo fdisk /dev/sda
-
2. Delete the existing partition (don’t worry, this won’t erase data as long as you recreate it with the same start sector):
- Type `d` and choose the partition number to delete.
3. Recreate the partition:
- Press `n` to create a new partition, select primary (`p`), and use the same start sector (this is crucial for data retention). For the last sector, choose the desired new size or use the default to use all available space.
4. Write changes by pressing `w`.
4. **Resize Filesystem**: After adjusting the partition, resize the filesystem to use the new space:
sudo resize2fs /dev/sda1
5. **Reboot**: Finally, reboot your system to apply changes:
sudo reboot
FAQs
How to ensure data safety
Disk cloning with free tool IM-Magic Partition Resizer is a nice option to clone the entire disk to another disk for backup.
- To clone a disk containing OS, you may start with Tools tab, and then click 'Migrate OS Wizard'.
- To clone a disk without OS, you may right click the whole disk, and then click 'Copy Disk'.
Also read: How to clone disk free
