Format 64GB/128GB SD Card FAT32 on Windows 11/10 and MAC
Scenario: Can't format 64GB (and above) SD card FAT32 in Windows
You have a 64GB SD card that you want to format to FAT32 for compatibility with devices that require this file system format, such as older cameras or game consoles. However, when you try to format it in Windows, you find that FAT32 isn't available as an option.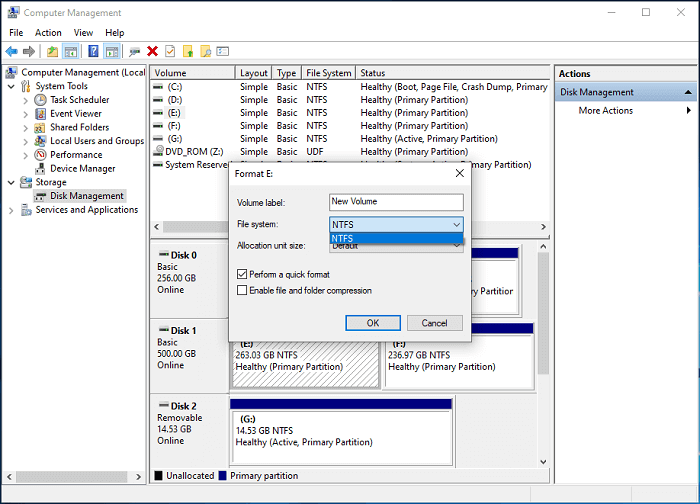
Also read: can't format sd card fat32
Problem:
Windows restricts formatting larger drives to FAT32 due to limitations in the formatting tools provided by Microsoft. FAT32 is generally limited to volumes of 32GB or smaller within Windows' built-in formatting tools. Attempting to format a larger volume will usually result in only NTFS and exFAT being offered as options.

Quick Question: Can you format 64GB sd card fat32 in Android mobile?
Answer: Android cannot format sd card over 32GB to fat32. You need a Windows third party free tool like IM-Magic Partition Resizer to get large SD card formatted to FAT32.
Solutions
Fix 1. Use IM - Magic Partition Resizer [Free Tool]
Preparations:
1. Please backup your sd card before the formatting since it will erase all data on the memory card.
2. Download the free tool at first. Install it on your Windows computer, and insert your sd card to PC.
Step1. Right click SD card, and select "Format Partition" option.

Step2. Select "FAT32" in the format window.

Step3. Click "Apply Changes" to start the formatting.

NOTES:
➤ When the 128GB SD card is brand new, it will appear as unallocated space. You can simply right-click on it and choose "Create Partition" to establish a new volume formatted with the FAT32 file system.
➤ When the 64GB/128GB SD card is a used one, data will be removed after the formatting. So please backup data or recover data before the formatting.
➤ If the 128GB SD card currently employs the NTFS file system, you have the option to utilize the "Convert NTFS to FAT32" feature in Partition Resizer. This functionality facilitates the conversion between FAT32 and NTFS file systems without the need for formatting, ensuring the preservation of data integrity.
Method 2. Shrink SD card less than 32GB
Here are the steps to shrink an SD card to less than 32GB using Disk Management:
-
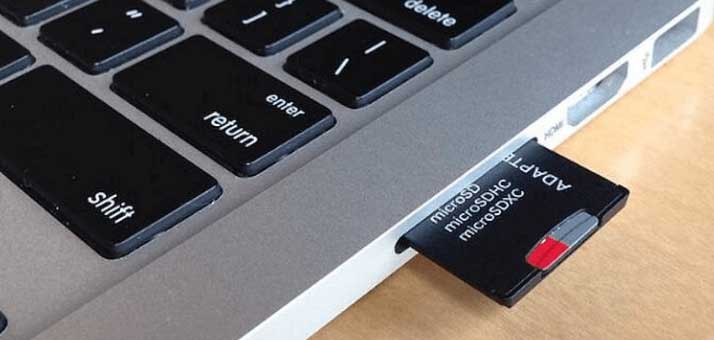
1. Insert SD Card: Insert your SD card into the card reader slot on your computer or connect it via a card reader.
-
2. Open Disk Management: Press Win + X on your keyboard and select "Disk Management" from the menu that appears. Alternatively, you can right-click on the Start menu and choose "Disk Management" from there.

-
3. Locate Your SD Card: In Disk Management, you'll see a list of all connected drives. Locate your SD card in the list. Be cautious not to select any other drive to avoid accidental data loss.
-
4. Shrink Volume: Right-click on the volume of your SD card and select "Shrink Volume" from the context menu.
-
5. Specify Shrink Size: In the dialog box that appears, enter the amount you want to shrink the SD card by. Make sure it's less than 32GB. Keep in mind that the value is in MB, so for example, if you want to shrink it by 5GB, enter 5120 (1GB = 1024MB).

-
6. Confirm Shrink: After entering the desired size, click "Shrink". Disk Management will process the request, and you'll see the unallocated space created.
7. Format SD card FAT32 in Disk Management: After shrinking the SD card to be less than 32GB, the fat32 format option will show up once you click the 'Format Partition'. Then the sd card can be changed to FAT32.
-
8. Extend SD card: If you want to use the unallocated space, right-click on it and select "Extend Volume". Follow the wizard to add the unallocated space to the SD card.
-
9. Eject SD Card:Safely eject your SD card from your computer.
By following these steps, you should be able to shrink your SD card to less than 32GB using Disk Management, format it fat32, and then extend it.
Method 3. Using Other File System EXFAT/NTFS
When FAT32 is not available in Windows, and you don't want to try other ways, you may directly go with other File Systems such as EXFAT or NTFS to get it formatted.
Choose File System: In the Format dialog box, you can choose the desired file system from the "File system" dropdown menu. Select either "exFAT" or "NTFS," depending on your preference and compatibility needs.
Method 4. Format SD FAT32 under Mac
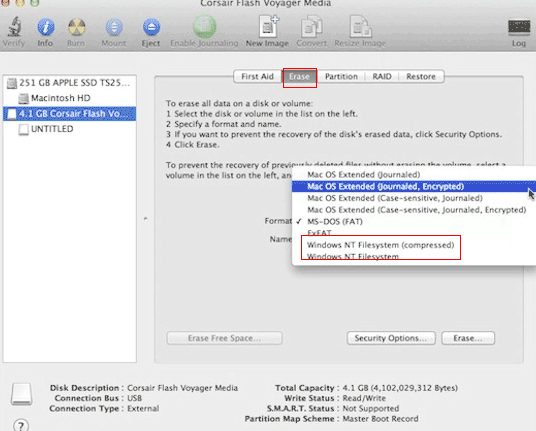
The following image shows that MOS-DOS (FAT) is actually fat32 in MAC that you can format your sd card fat32 under its Disk Utilities.
Formatting a 128GB SD card to FAT32 under macOS can be done using the Disk Utility application. Here's how to do it:
-
1. Connect the SD Card: Insert the SD card into the card reader slot on your Mac or connect it via a card reader.
-
2. Open Disk Utility: You can find Disk Utility in the "Utilities" folder within the "Applications" folder, or you can use Spotlight (Command + Space) and search for "Disk Utility".
-
3. Select the SD Card: In Disk Utility, you should see a list of drives and volumes on the left sidebar. Select your SD card from the list. Make sure you select the correct disk, as formatting will erase all data on it.
-
4. Erase the SD Card: Click on the "Erase" button in the toolbar at the top of the Disk Utility window.
-
5. Configure Format Options: In the dialog that appears:
- Choose a name for the volume (you can leave it as is or give it a new name).
- Select "MS-DOS (FAT)" from the "Format" dropdown menu. This is the FAT32 file system.
- For Scheme, select "Master Boot Record". This is necessary for compatibility with some devices.
- Ensure that the Format is set to "FAT32".
6. Start Erasing: Once you've configured the format options, click on the "Erase" button. A warning dialog will appear informing you that erasing the disk will delete all data stored on it. If you've backed up any important data, click "Erase" to confirm and proceed.
Wait for Completion and Eject the SD Card: Once the process is complete, you can safely eject the SD card from your Mac.
Your 128GB SD card should now be formatted to FAT32 and ready for use.
Diskpart/Disk Management/Windows Format Cannot format 128GB SD card to FAT32?
As we're aware, Windows 11/10/8/7 provides built-in utilities for managing hard drives and partitions, namely Disk Management and Diskpart. These tools are convenient for formatting hard drive partitions and external drives. However, formatting large partitions or drives exceeding 32GB to FAT32 presents a challenge with these native tools. Notably, neither Disk Management nor File Explorer offer the option to format to FAT32, and attempting to do so via Command Prompt results in an error stating that the volume is too large for FAT32. Consequently, resorting to third-party formatting software becomes imperative in such scenarios.
Diskpart says: The volume size is too big when formatting large sd card to fat32.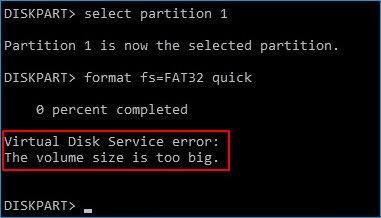
Frequently Asked Questions
Q1. Formatting a Micro SD card to FAT32 from exFAT?
A: If the Micro SD card is less than 32GB, you can get it formatted under Disk Management or other format methods. If the Micro SD card is over 32GB like 64GB, 128GB or 256GB or even larger, you need to use a third party format tool like IM-Magic Partition Resizer that can help format exFAT Micro SD card to FAT32 for free.
Q2. What is the maximum size SD card for FAT32?
A: If it's default setting in Windows, it allows less than 32GB maximum for a FAT32 sd card. However some third party free tool can extend the limit that you can set sd card fat32 as much as you need.
Q3. How do I format 64GB SD to FAT32 on Windows 11?
A: Try free tool IM-Magic Partition Resizer that can help format 64GB SD card to FAT32 on Windows 11 10 8 7 and more.
Q4. How to format sd card to fat32 on Android?
A: The storage capacity of the SD card matters in this case.
I. For sd card less than 32GB, you may get it formatted fat32 on Android phone in the following way:
For an Android phone, access the "Settings" menu and navigate to either "Storage" or "SD & Phone". From there, choose the "Format SD card" option. On a Windows phone, find the "Settings" menu and select "Storage" or "Phone Storage". Then, tap on the "Format SD card" option.
II. Formatting a 64GB SD card to FAT32 directly on an Android device might not be possible through the default settings or apps. However, you can achieve this by using a third-party file management app available on the Google Play Store. One such app is "FAT32 Format" or similar apps designed for this purpose. Here's a general guide on how to do it:
- Install a Third-Party File Management App: Go to the Google Play Store on your Android device and search for "FAT32 Format" or similar apps. Download and install the app of your choice.
- Insert the SD Card: Insert the 64GB SD card into your Android device.
- Open the File Management App: Launch the FAT32 Format app that you installed.
- Select the SD Card: In the app, you should see a list of storage devices connected to your Android device. Select the 64GB SD card from the list.
- Choose FAT32 Format: Look for an option within the app to format the SD card to FAT32. Follow the on-screen instructions to initiate the formatting process.
- Confirm the Action: The app may prompt you to confirm that you want to format the SD card. Make sure you have backed up any important data before proceeding, as formatting will erase all data on the card.
- Wait for Completion: The formatting process may take some time depending on the size of the SD card. Be patient and let the app complete the task.
- Eject the SD Card: Once the formatting process is finished, safely eject the SD card from your Android device.
Conclusion
Formatting a 128GB SD card to FAT32 is effortlessly achievable with the assistance of IM-Magic Partition Resizer. Not only does this tool excel at formatting tasks, but it also offers a plethora of additional features. For instance, it facilitates booting Windows from an SD card, wiping SD cards, cloning SD cards, transferring the operating system to an SSD, converting disks between MBR and GPT without partition deletion, and much more.